Document types & templates
If you want to create your own document types/templates, you can do so by from the Workspace settings

Custom document templates
Most of the document types provided by Brainframe come with some sort of document template (some simple, some more complex), but you can also apply your own. Templates are the initial texts shown when you create a new document, and our system tracks the different versions of templates you create for audit purposes.
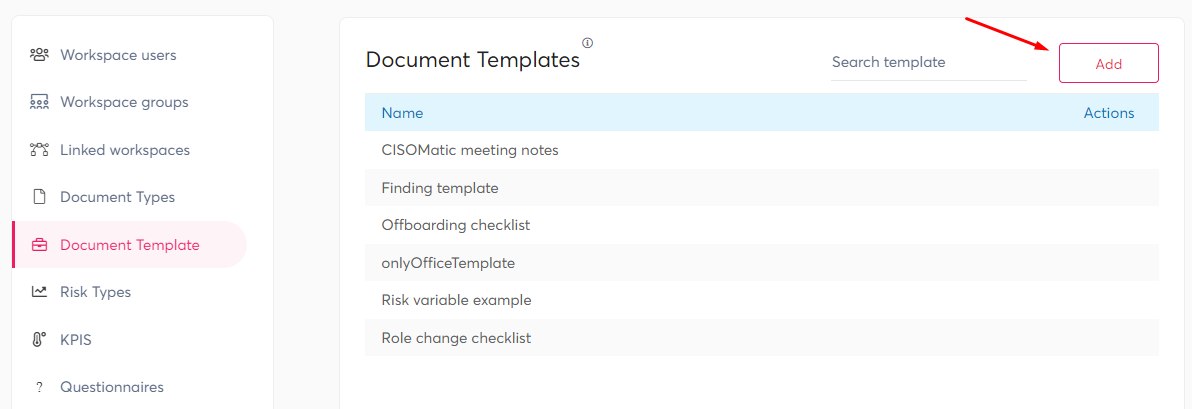
Select the "Document templates" section from the Workspace settings screen, and click on Add
Document templates can either be made using our standard editor or using the advanced editor (onlyoffice) if you want to keep actual Word/Excel/PowerPoint documents.
Standard editor
Our standard editor has most of the features you need for simple text editing. Due to its tight integration with Brainframe, we can embed variables and links inside the texts. When you select this type, you'll be presented with the following screen

- The template title you will be able to select when creating your own document types (see below)
- When this checkbox is enabled, ALL document types without a template will get the current template applied
- The editor type (Standard or advanced)
- When Standard is selected, you can optionally enable the Markdown format
- The actual content of your template that will be used when this template is assigned to document types
- This is a preview window showing the rendered version of the markdown text if it is enabled in 4
- An optional license that will be attached to any document created based on this template. Licenses will be attached to a document for the rest of their lifespan, including when copied to other workspaces
TIP
Notice the "Insert" dropdown in the editor which allows you to add frequently used text blocks, the current date and helper texts.
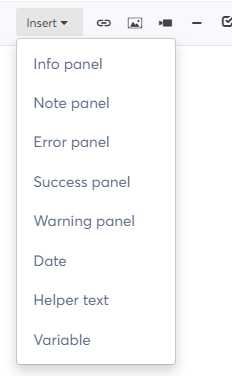
TIP
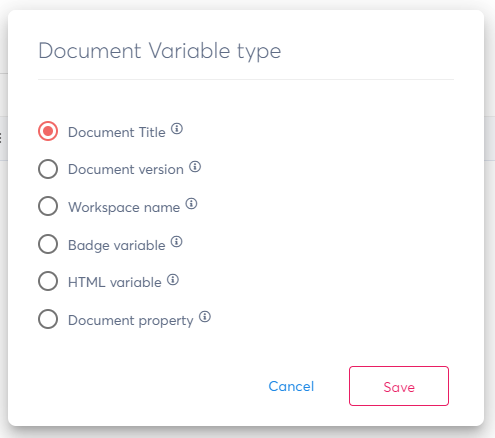
Please also notice the last option of this "Insert" menu, called "Variable", which allows you to add variables in your document/template that will automatically update with properties of the document. You can also use it to create placeholder that you can later use inside our Bulk import/creation of documents/assets
Advanced editor (onlyoffice)
We use the Onlyoffice editor to visualize and edit any Word/Excel/PowerPoint documents, ensuring your documents remain fully downloadable and editable with other Office editors. When you select this type, you'll be presented with the following screen
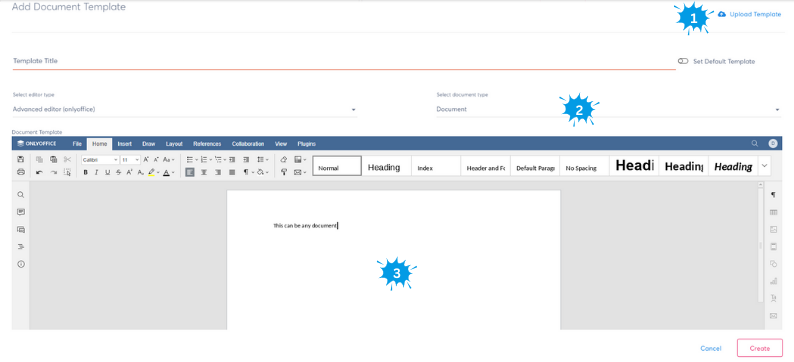
- Allows you to upload any existing Word/Excel/PowerPoint template you already have to be used as a template
- Here you can select what type of editor you want to use for your template (Word/Excel/PowerPoint)
- This is the actual content that will be used as a template, which you can also update according to your needs
Custom document types
Now that you know how you can make document templates, lets see how we can use them.
Select the menu "Document types" on the left, and click the Add button on the right top to create your own document type

This opens the document type creation screen:
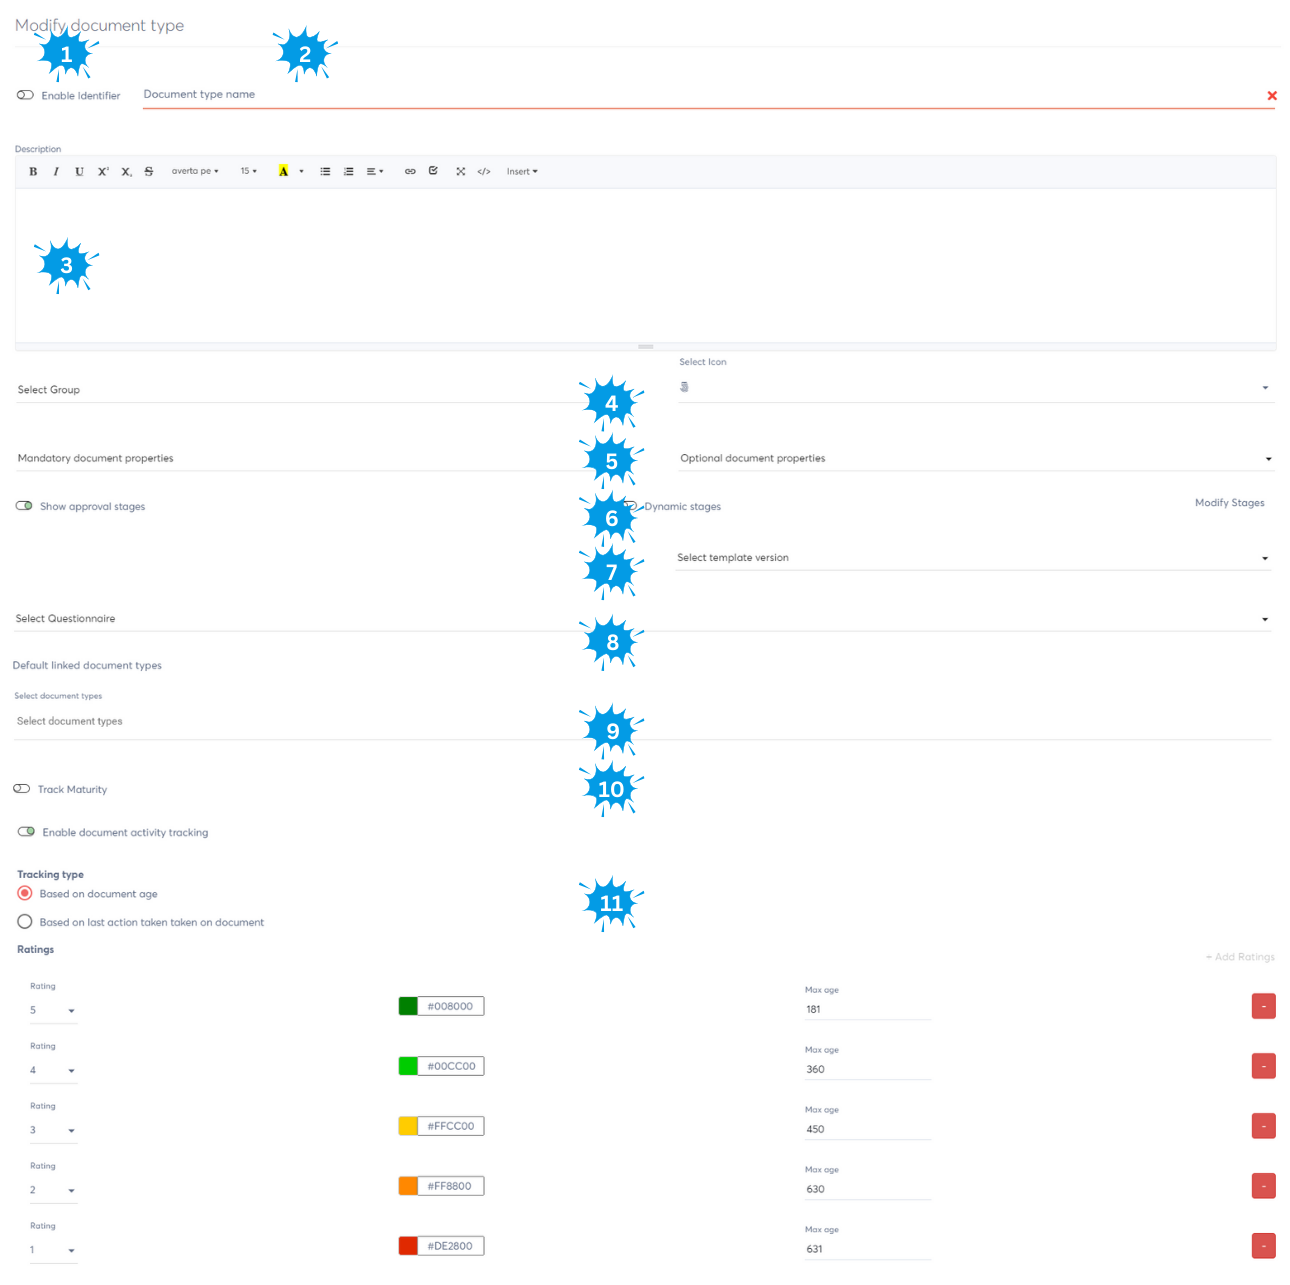
- Each document type can be configured to require a unique identifier with optionally with a prefix (e.g. R-00x, CAPA-, ...)

- The document type name that will appear in the Create documents section dropdown
- The description tooltip of the document type that will be shown to guide users in the "Create document section"
- Document types can be assigned to one of the main categories with each their own color to easily distinguish them (Operations, Strategy, Business & people, Security, Privacy, Quality, Digital assets, Physical assets, Legal, Software as a service and data records). On the right side you can select an icon that will be used to represent the document type and its documents
- On the left you can configure mandatory document properties that need to be provided during document creation of this document type, while on the right you can configure optional properties (e.g. Owner, Supplier type, Non-conformity type, Classification, ...)
- By enabling this checkbox the Document approvals can be configured for any document of this type that is assigned a version. You can configure if the approval is static (no changes per approval stage) or activate the dynamic checkbox if you want to allow changes in each approval stage (e.g. for change management, quality management). The button on the right allows you to configure each stage, including which user will be able to approve specific stages, and who will be notified.

- Here you can select the Document template (explained on top of this page) that will prefill the content on creation. You can select specific versions of the template, or configure to always use the last one. You can also use Word, Excel or PowerPoint documents as templates.
- By selecting a Document questionnaire a dedicated menu will be shown in the document viewer that allows you to keep track of specific questions & answers collected during an audit

- For specific document types (eg. risks, non-conformities), it makes sense to immediately ask during their creation what other documents they should be linked to or depend on (e.g. a new risk document can be related to assets, suppliers, policies, ...). The document types you configure here will be shown during the creation of any document of this type.
- By enabling the "Track maturity", you will see an additional dropdown for each document of this document type. This maturity will also be shown in the SOA section, allowing you to quickly visualize the maturity of your compliance

- When you enable "document activity tracking", you can either
TIP
If you want to override some Brainframe provided document types, you can do so by creating a new document type as described above, but using an existing document type name from the "Create new document" dropdown, and putting all other configurations as you desire. (please do a full refresh of the page for this to take effect)
Using content from templates on documents
Another way to use templates is to simply apply the content of any template on a document you currently have open.
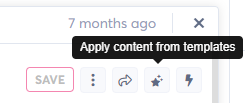
Apply content from templates
By clicking on the star icon during the creation of new documents

Or while in EDIT mode on any document
It will open the template selection screen showing all templates from workspaces you have access to:
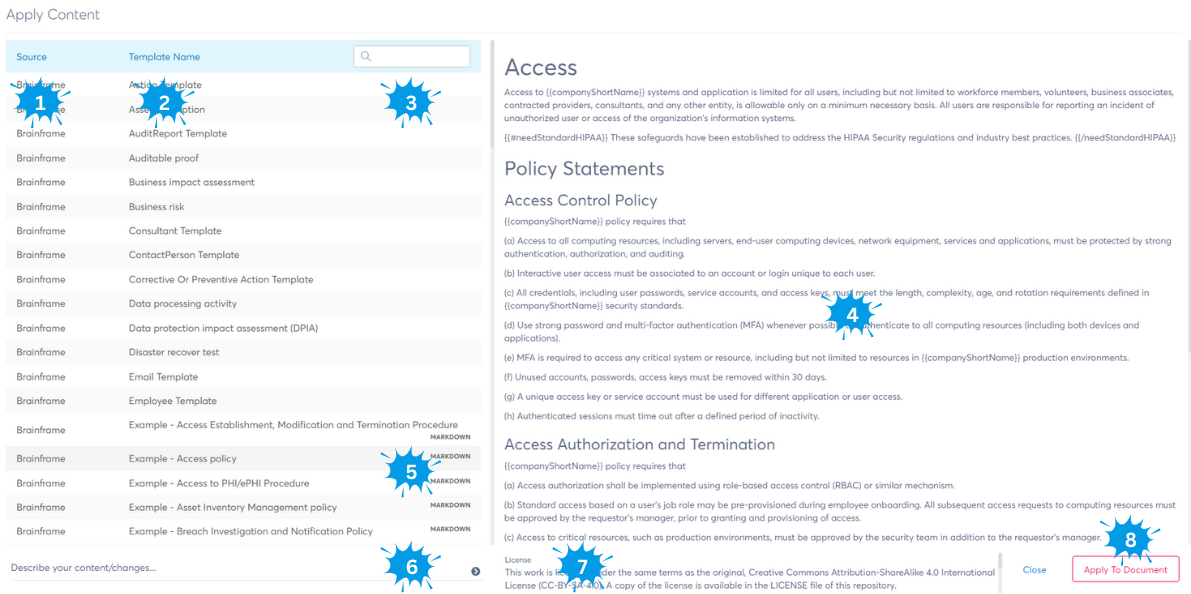
- Source workspace where the template comes from
- Name of the template
- Quick search on template
- Preview of template content
- Indicator of template format
- Nothing: simple editor
- Markdown: The markdown format
- Word: Document editor
- Excel: Spreadsheet editor
- PowerPoint: Presentation editor
- This chat feature allows you to interact with the template and use AI to modify the contents
- Here you can see the license attached to the template. This will be applied to any document using this template
- Once you are finished, you can click on this button to apply it to the current document