Request forms
To be effective in security and compliance management, you need to make sure that people comes to you, instead of running behind them. This is why we always recommend to make a simple one-pager intranet page with key links for your management system available on a domain name that everyone can remember (e.g. compliance.company.com).
Here is an example of how such a page could look, which can easily be added into your existing intranet or using tools like Google sites builder or Microsoft SharePoint team sites where you can limit the access to staff only.
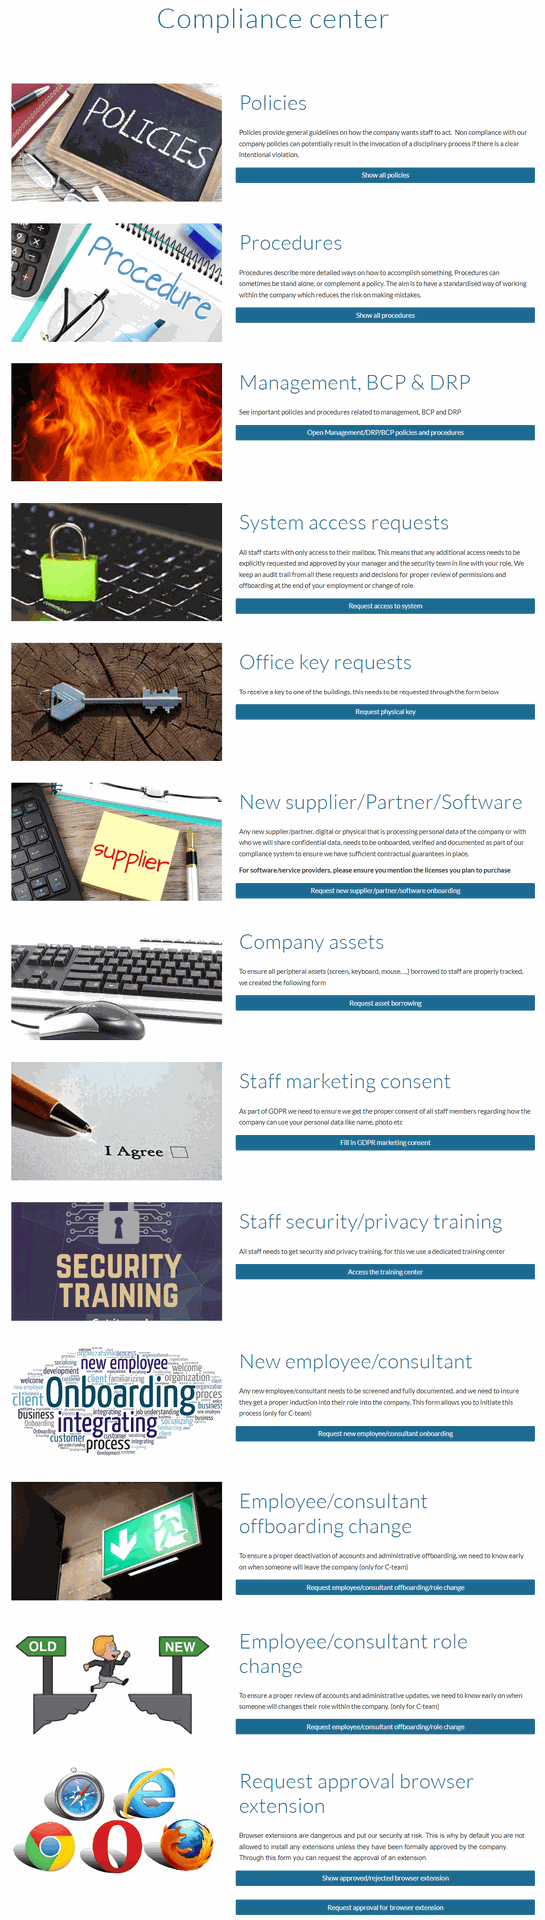
Each of these items are the starting point of a dedicated process in your management system, and having a central place to start will make it easy to explain to staff members.
Similar to the call for action examples above, you might also want to allow customers on your public privacy page to click a button and send in requests related to their GDPR/Privacy rights, which should then again trigger a process from your side.
Integrated forms
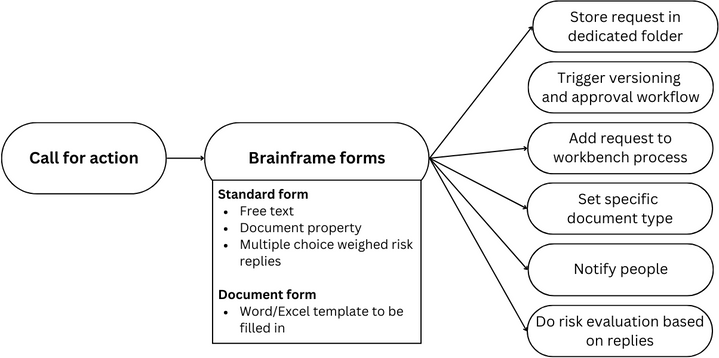
The main challenge with the two examples given above starts after the call for action. How do you consistently collect the right information, how do you collect evidence of these requests, how do you trigger approvals, how do you add automatically fit these requests in a multi-step process and how do you automatically (re)evaluate risks related to requests?
This is exactly why we built the Request forms in Brainframe, giving you the flexibility you need
Forms are accessible from the "Forms" module, and during the creation you'll be asked different questions, depending on the type you select
Standard forms
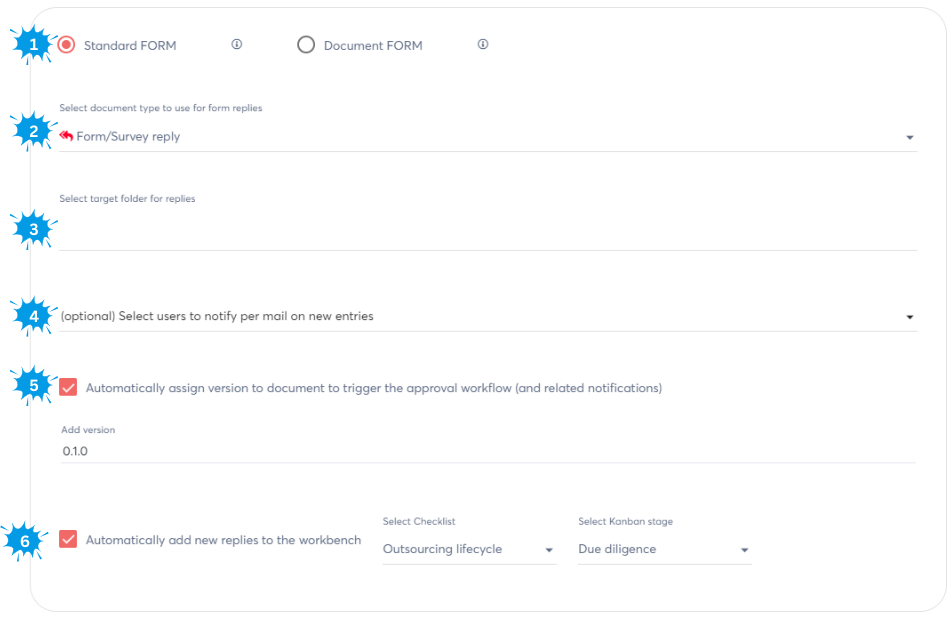
- Select the type of form (here we show standard forms)
- Define the document type to be used for the document that will be created with all the replies
- Define the target folder where the document with all replies should be stored
- Optionally define which Brainframe users need to be notified when there is a new reply
- Automatically assign a version and trigger the document approval workflow on that document (if configured)
- Automatically add the document on a specific checklist Kanban stage in the workbench process management
On the next screen you'll be asked to fill in the general form information:
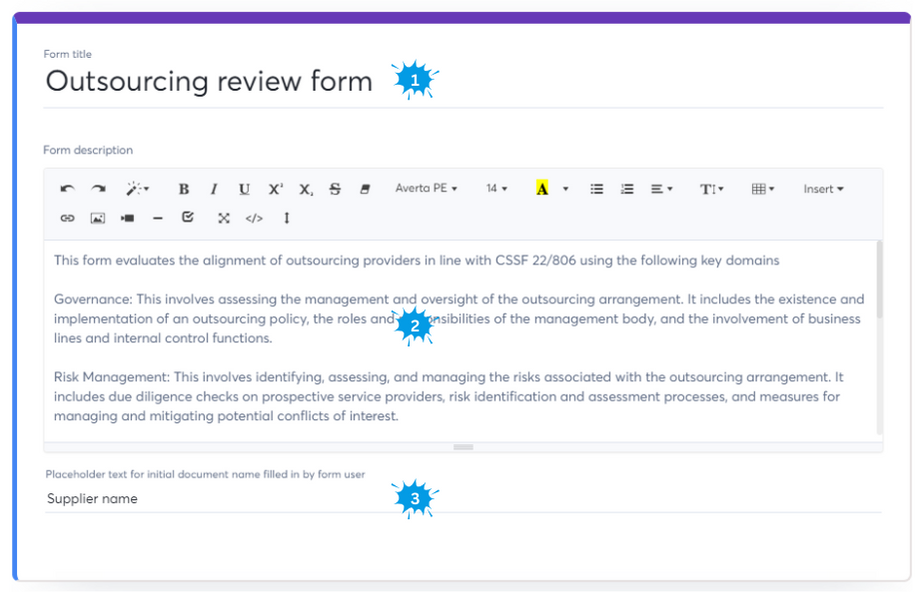
- The form title
- Here you can provide guidance to the people who will fill in the form
- This field will be used in concatenation with the form title to generate the document name of the form reply
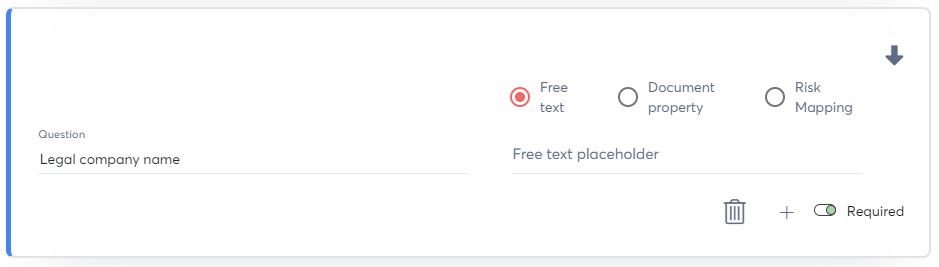
After that you can configure your questions:
- Free text forms allow you to collect generic information, and the ability to put a text placeholder
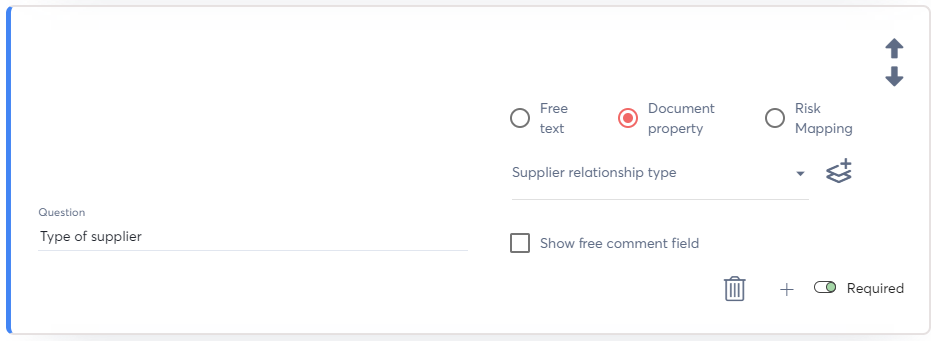
- Document property
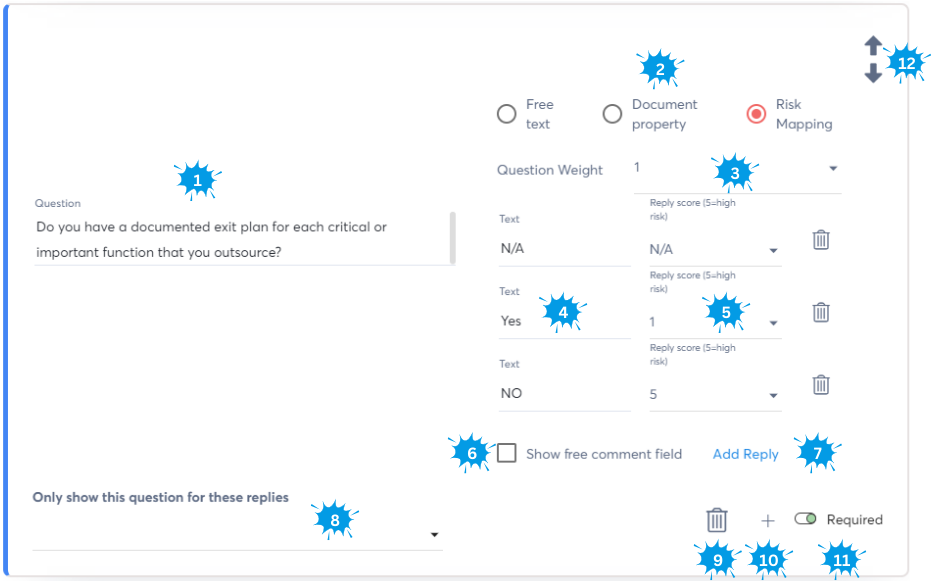
- Multiple choice weighed risk replies (risk mapping)
All of the above work in a similar way
- Provide the question to ask
- Define one of the 3 reply types
- (Risk mapping only) Provide a weight from 0-1 to define the impact of the reply during the risk evaluation
- (Risk mapping only) Provide possible replies that can be selected
- (Risk mapping only) Define the score from N/A to 0-5 for the reply (5=high impact)
- (Document property & Risk mapping) Allow an additional free comment field to justify the reply
- (Risk mapping only) Add/remove reply options
- (Risk mapping only) Define if the question should be shown based on a previous risk mapping type reply
- Remove the questions
- Add a question after the current card
- Require that a reply is given for this question
Once the form is created, you can work with it

- Select other forms
- Copy the public link to the form
- Open the public link to see how the form looks (see example below)
- Open the reply folder that is configured for this form
- Save changes you made to the form
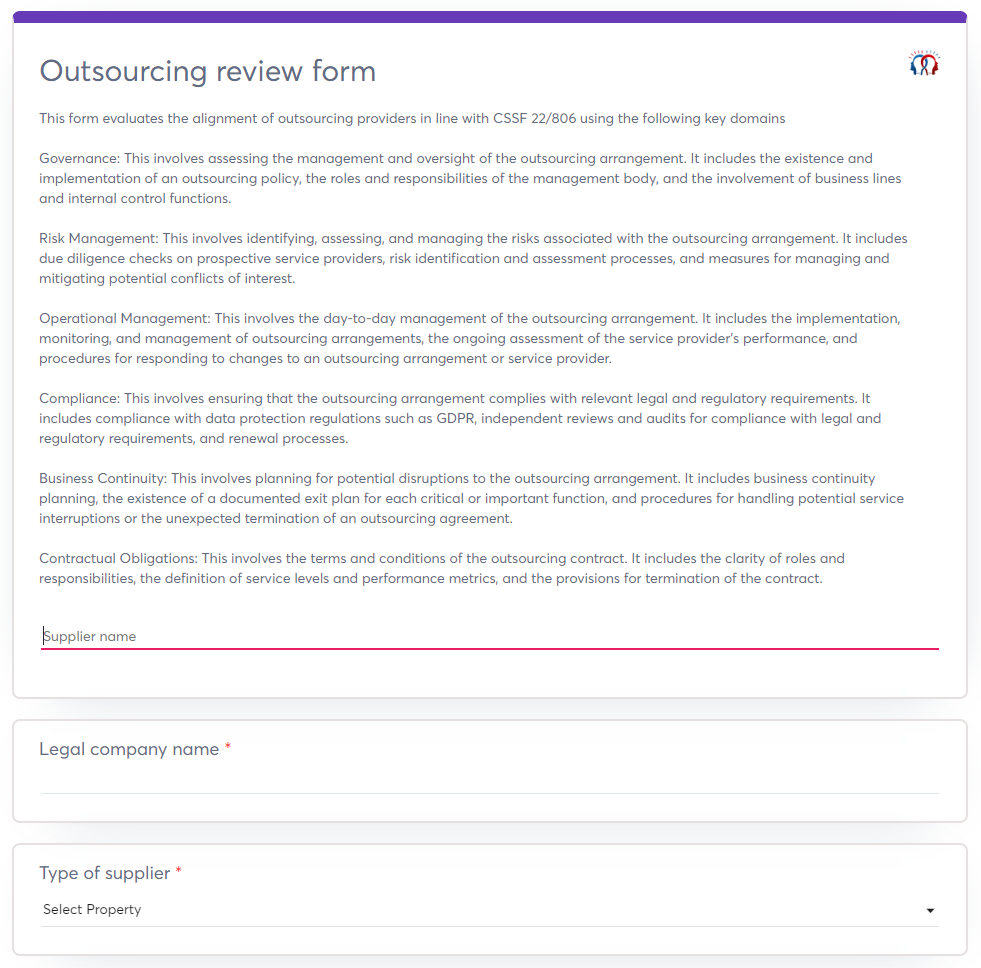
The end result of the published form will look like this. Notice that your branding will be used
Document forms
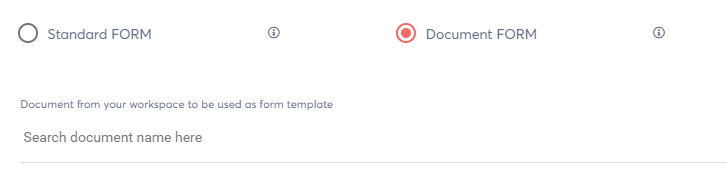
This works similarly to standard forms, but in here you'll need to provide a Word or Excel file that you already uploaded in your folder hierarchy.
By typing the name of a document from your workspace in the "search document name here" field, you can select the document that will be used as a template on your form (e.g. Word, Excel, Simple Brainframe doc)
When a normal document is selected as template, it can look as following:
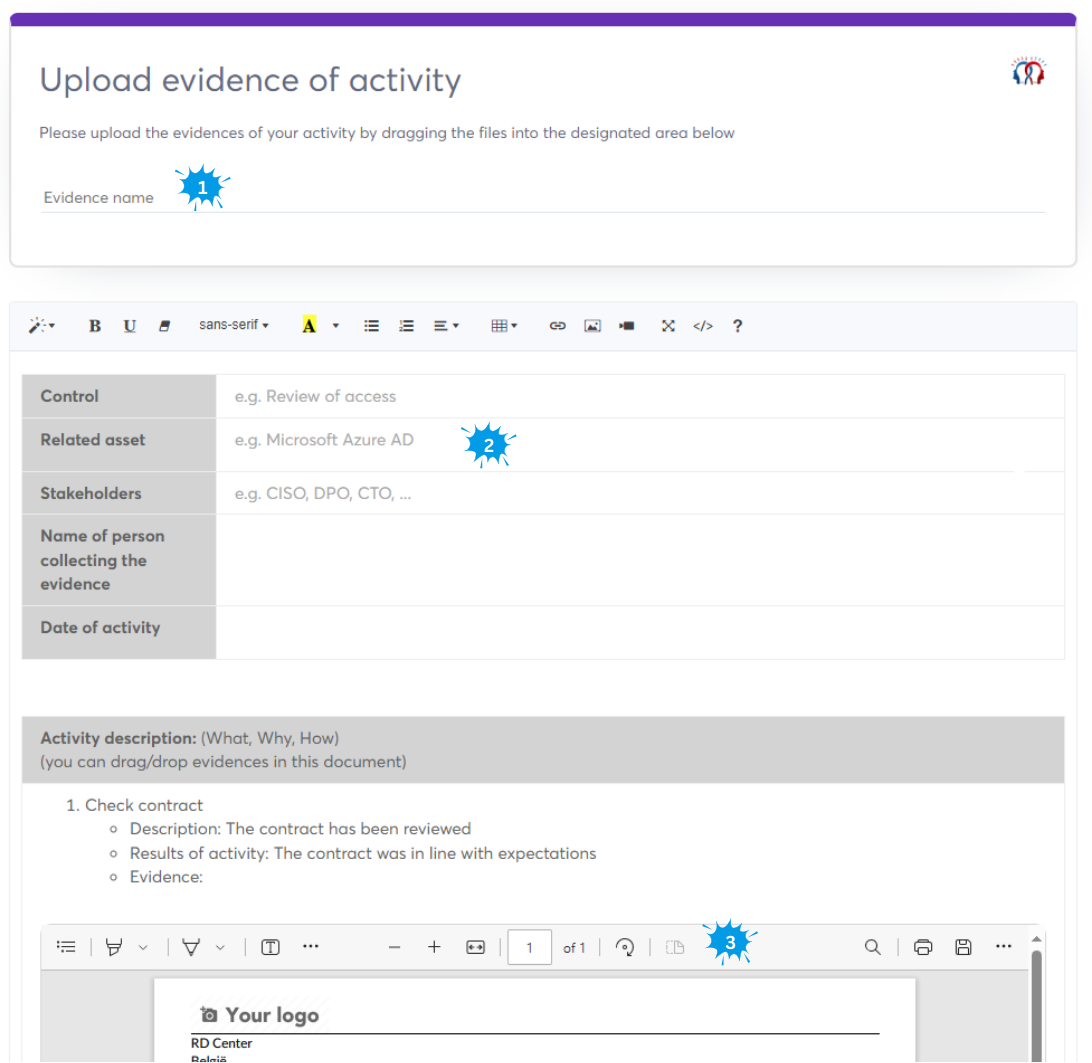
- The name that will be given to the document of the form reply
- In this case the template guides the user to fill in text which they can directly update in the form
- Users can even upload document attachments related to the form such as evidences (eg images, pdf, word files) which will be uploaded in the same folder as the final form document
Below is a similar example, but this time with a word document as template
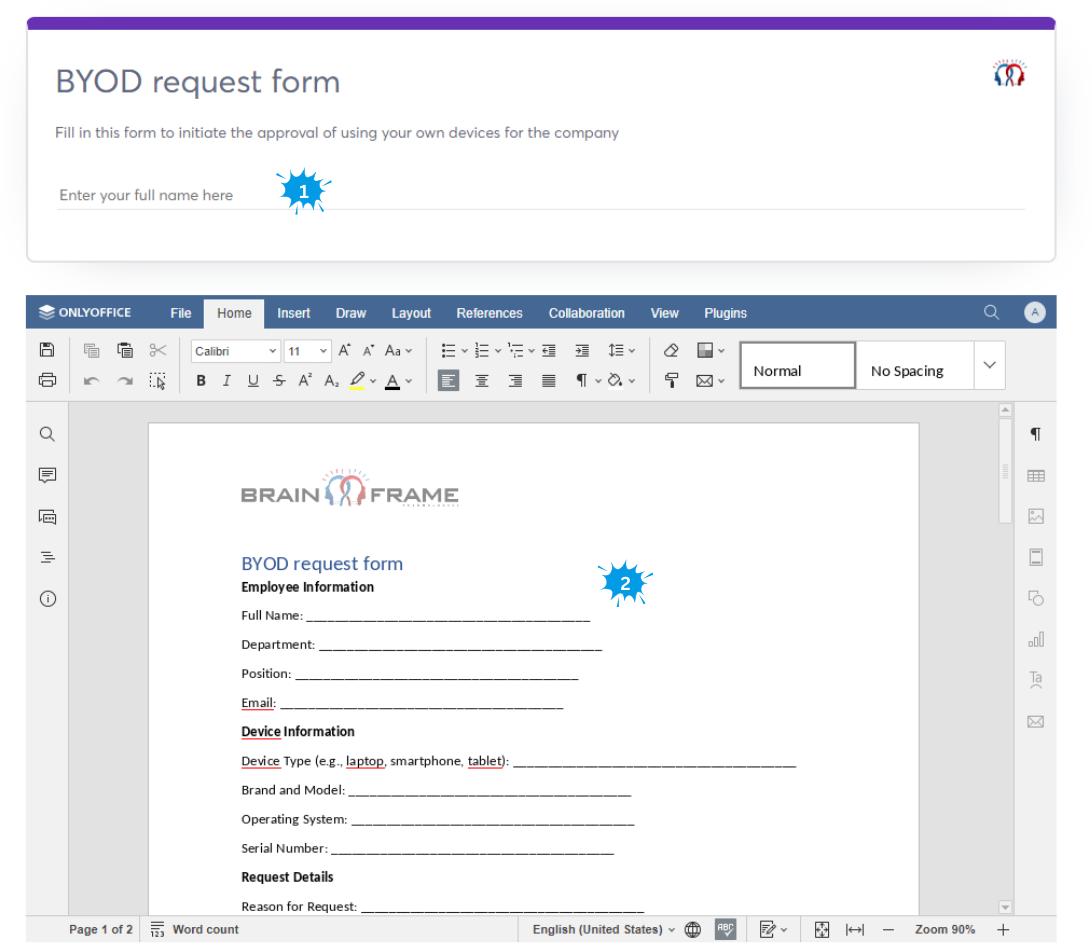
- Again the name of the eventual document
- This is the content of the word document you selected as template, which the user of the form can fill in.
NOTE
For now you can only drag/drop document attachment (e.g. evidences) using the simple editor, not with the onlyoffice editor
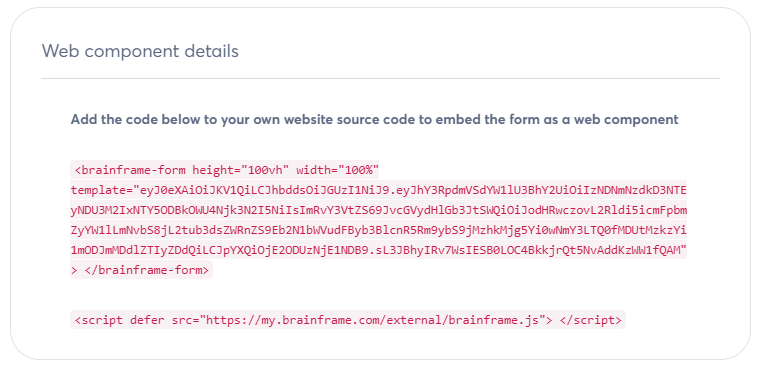
Embedding forms
At any time you can simply put a link to the form on your website, which will show the form on full page. But in certain cases you might want to integrate so that it looks like part of your website (e.g. GDPR request forms) or in your intranet (e.g. new supplier forms, ...). We make this easy by giving you the HTML code you can copy paste and give to your development team to embed into the existing website: