SAML SSO Microsoft Entra
This documentation describes the configuration steps to follow for Microsoft Entra
Create application
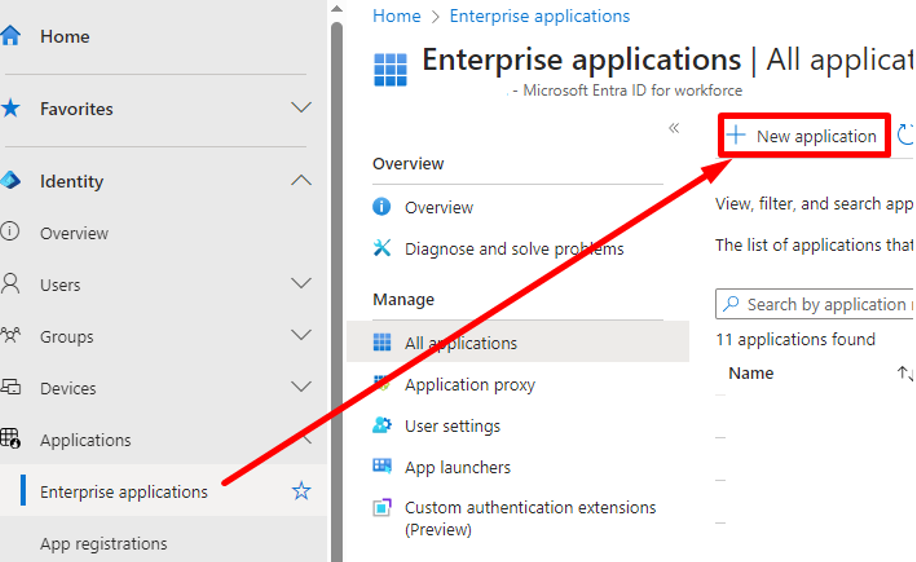
1. Got to the Entra admin center: https://entra.microsoft.com/#home and click "New application"
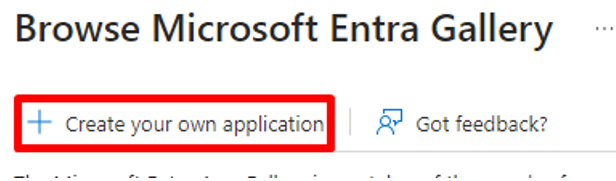
2. Now select "Create your own application"
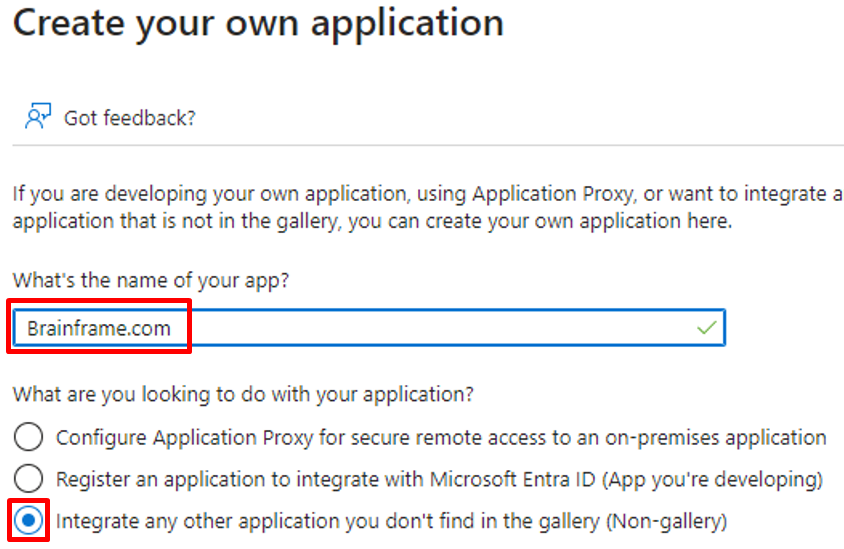
3. Give your application a name, and select a non-Galary application, and hit "CREATE"
Configure the Entra application
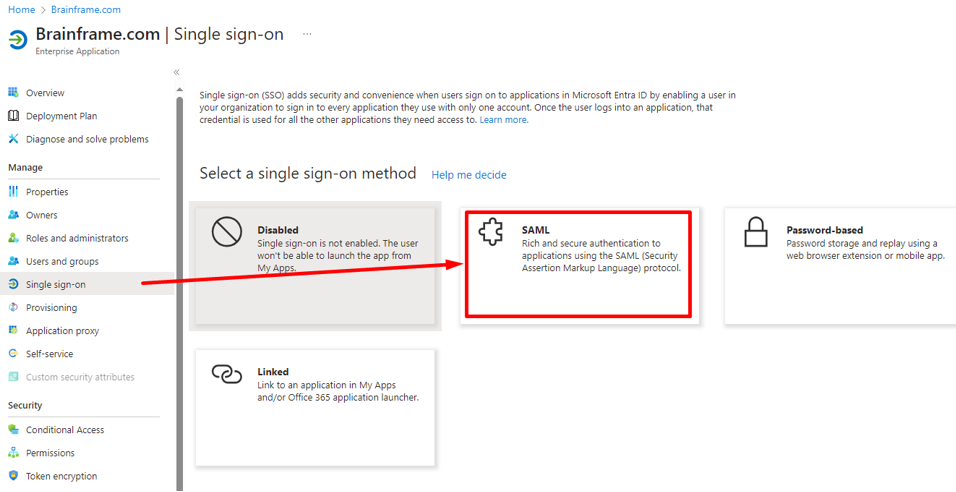
Now we are going to configure the new application's Single sign-on
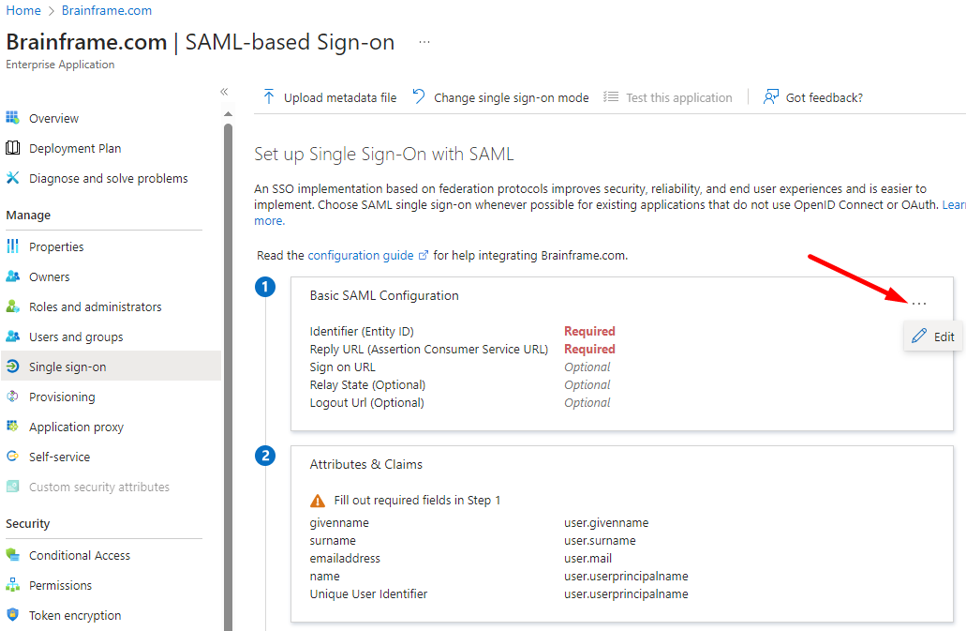
1. Select Single sign-on and click SAML
2. Now click edit on the "Basic SAML configuration" block
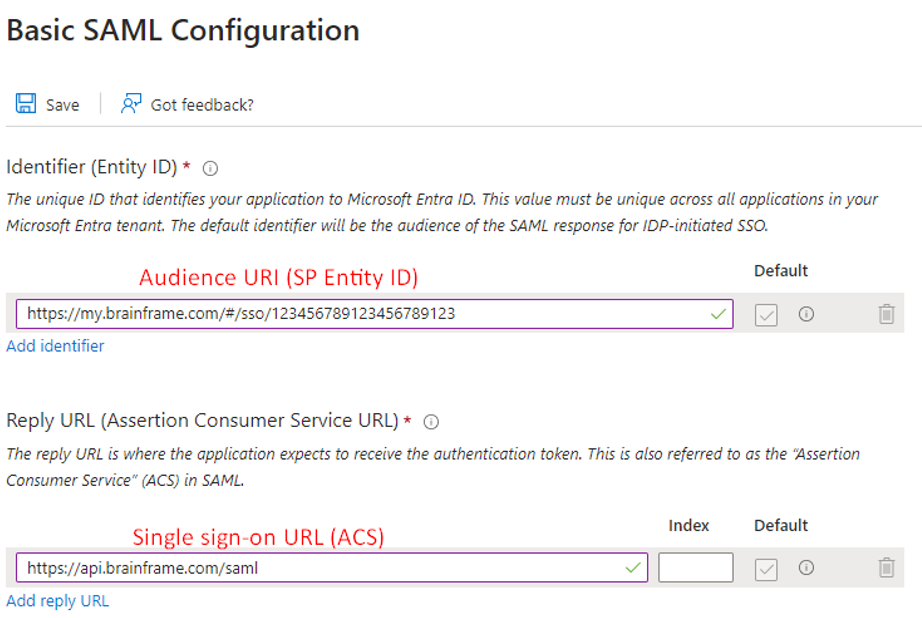
3. Look up the red text inside Brainframe workspace settings (Authentication) and fill them in accordingly, while leaving other options empty. Click SAVE
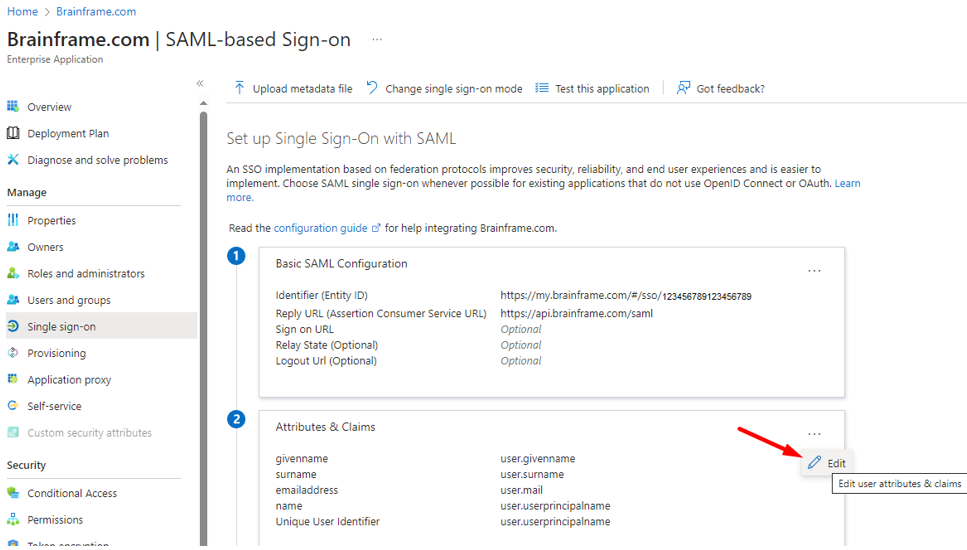
4. Now click edit on the "Attributes & claims" block
5. Delete all existing claims from "additional claims" (not required claim) by clicking the 3 dots and hitting delete
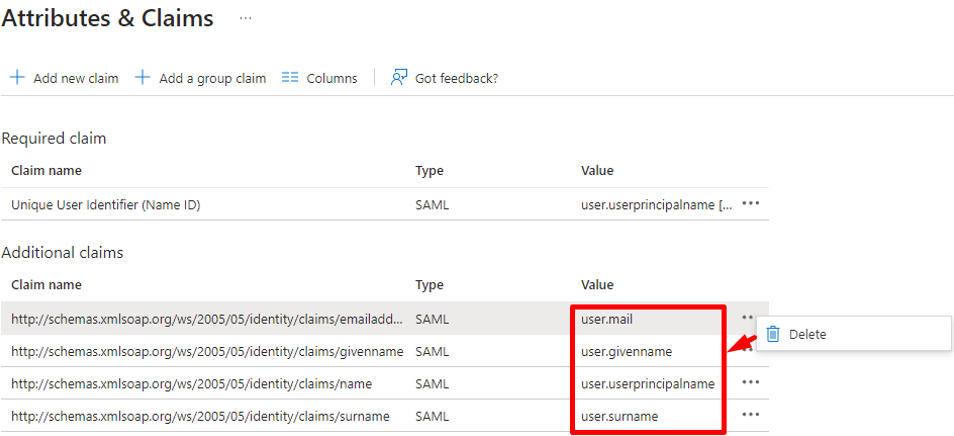
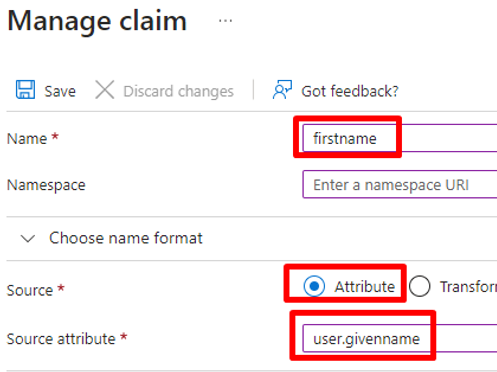
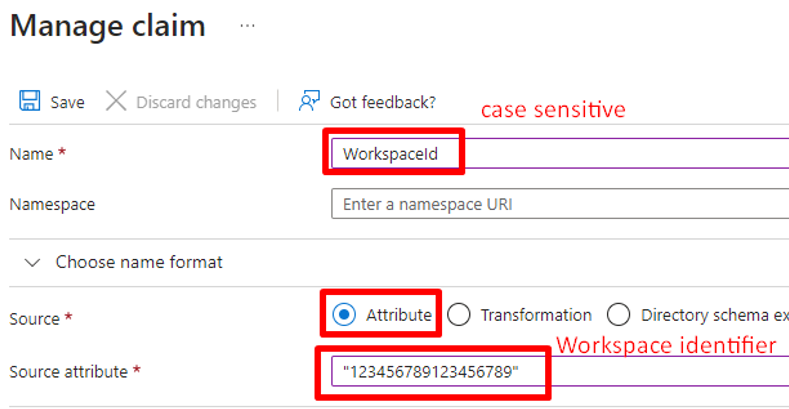
6. Now add your individual claims by clicking "Add new claim"

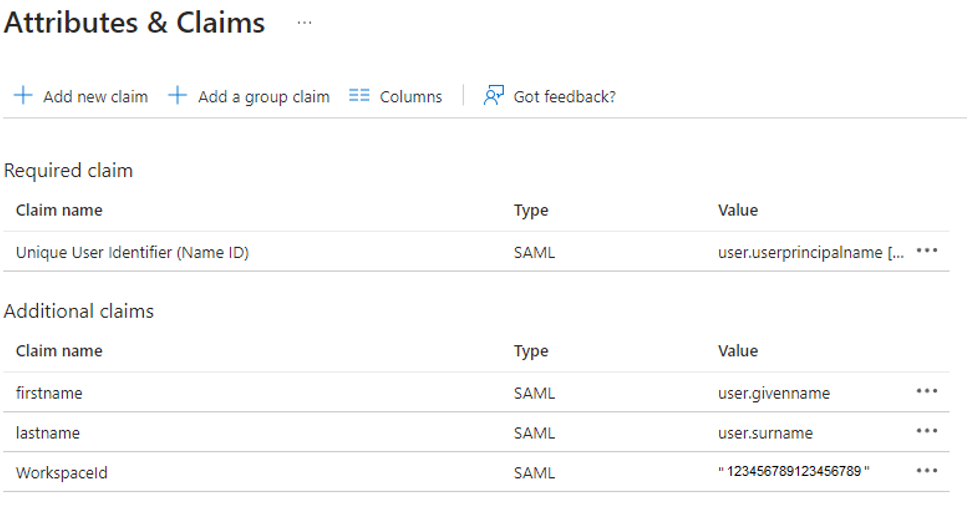
7. Now add the 3 required claims "firstname", "lastname" and "WorkspaceId" (attention, this is case sensitive!)

The end result will look similar to this:
Brainframe configuration
Now that the Microsoft Entra is properly configured, we are going to configure this application inside the Brainframe workspace settings (Authentication)
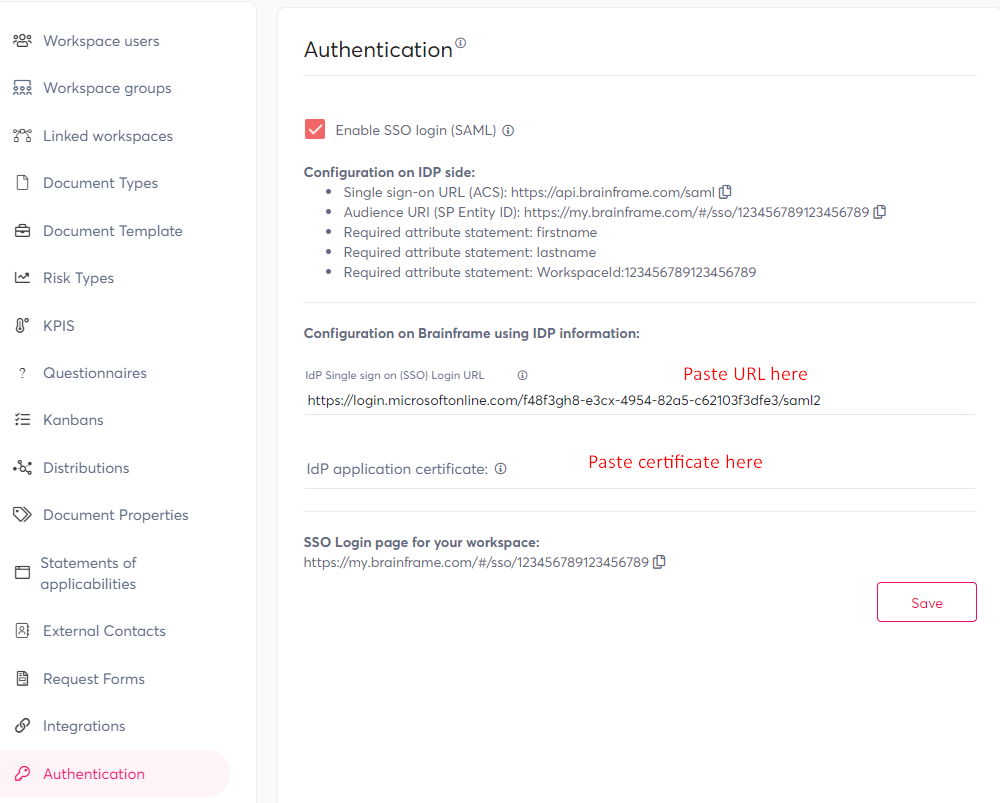
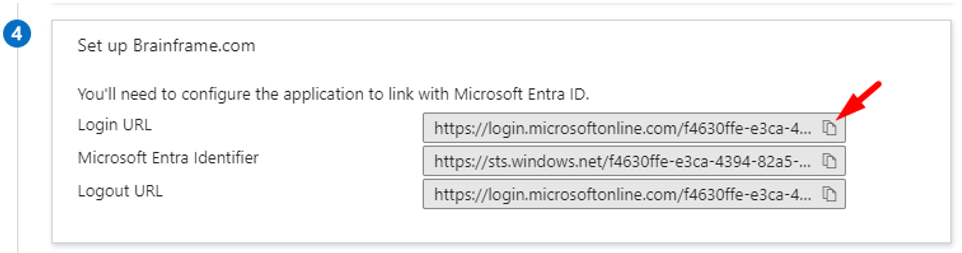
1. Copy the "Login URL" from Microsoft Entra and paste it in "IdP Single sign on (SSO) Login URL" field on Brainframe
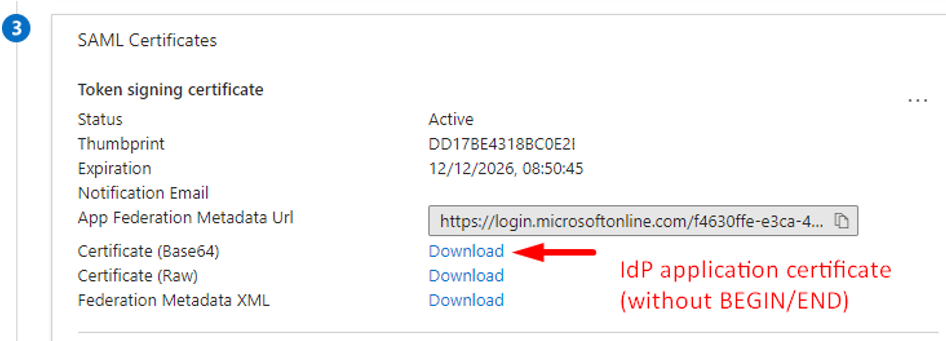
2. Download the Entra SAML Certificate in Base64 and copy the text without the BEGIN/END Certificate lines and paste it in the "IdP application certificate" field in Brainframe
Test the integration
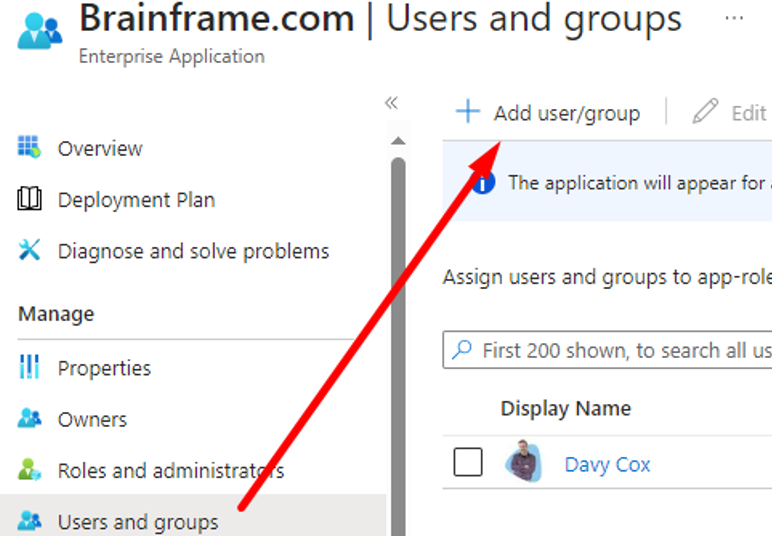
1. Now make sure to add users to your application before you test
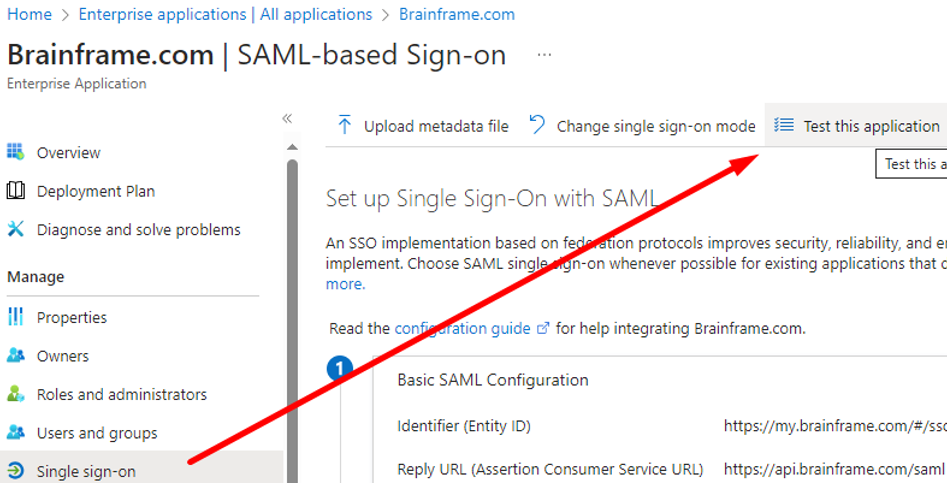
2. Test your application
3. Your app is now available to the assigned users
Common error:
Failed to read asymmetric key: you should update the “IdP application certificate “in brainframe settings with the IdP BASE64 certificate (without the BEGIN/END Certificate line)